

How to replace the belts on a Freightliner truck with a DD15 Engine
Posted by: Duaparts on
General Information
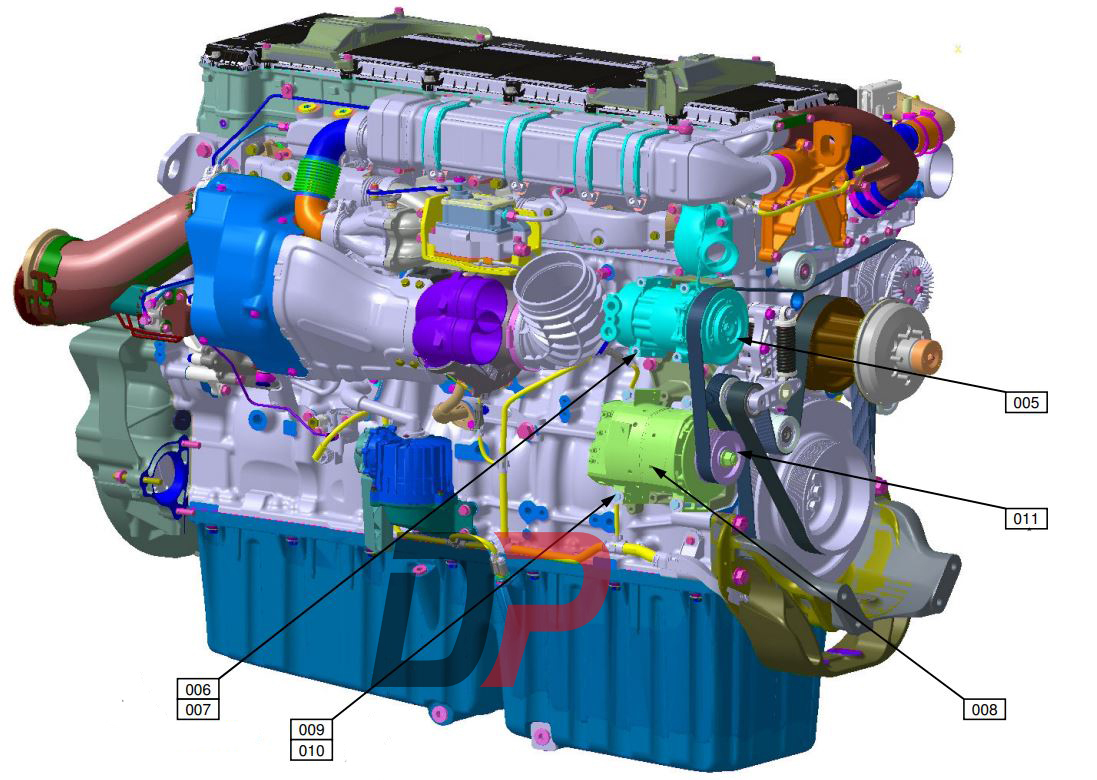
Detroit Diesel DD15 engines are equipped with two serpentine, poly-V drive belts and two automatic belt tensioners. The rear belt (closest to the engine block surface) drives the alternator, the A/C compressor, and the water pump. The other, front belt drives the engine fan. Both drive belts are kept at the correct tension by a system of pulleys and a dual automatic belt tensioner assembly. See Fig. 1 .

When replacing the drive belts for the DD15 engine, it is crucial to use the correct procedure for releasing and locking the belt tensioners. They must be released and locked separately, and in the correct sequence, or the assembly may be damaged. Because they are part of the same assembly, it may appear that both belt tensioners can be released at the same time by releasing just one. This is not the case. The assembly cannot handle such a strain, and there have been field reports of tensioner pulleys breaking off.
To prevent any damage to the automatic belt tensioners, follow the instructions in this bulletin, under "Drive Belt Replacement" when replacing the drive belts.
NOTE: These instructions are also located in the DD15 service manual, under "Belt Drive Tensioner System".
Drive Belt Replacement
1. Shut down the engine, apply the parking brakes, and chock the tires.
2. Disconnect the batteries at the negative terminals.
3. Raise the hood.
IMPORTANT: When releasing the automatic belt tensioners and removing the drive belts, always work on the front tensioner and belt (fan drive) first, then the rear tensioner and belt (alternator, A/C compressor, and water pump). When you unlock the belt tensioners, reverse the procedure; unlock the rear belt tensioner first, then front one.
4. Find the automatic belt tensioner assembly, on the left (passenger) side of the engine, as you are facing it.
CAUTION
Never rotate the automatic belt tensioners clockwise. To do so may damage them, and require replacement of the entire assembly. To prevent damage to the belt tensioners, always rotate them counterclockwise, and never use more force than 73 lbf·ft (100 N·m).
5. Insert a 1/2-inch breaker bar or 1/2-inch-drive socket wrench into the square hole in the idler arm of the front belt tensioner (grooved pulley), and smoothly rotate it downward (counterclockwise) until you feel resistance. See Fig. 2 . Do not use more force than 66 to 73 lbf·ft (90 to 100 N·m), or you could damage the tensioner.
6. Place a 3/8-inch (10-mm) diameter locking pin into the round hole on the idler arm of the tensioner. The tensioner is now locked in the released (pre-tensioned) position. Remove the wrench from the square hole.
7. Insert a 1/2-inch breaker bar or 1/2-inch-drive socket wrench into the square hole in the idler arm of the rear belt tensioner (smooth pulley), and smoothly rotate it downward (counterclockwise) until you feel resistance. See Fig. 3 . Do not use more force than 66 to 73 lbf·ft (90 to 100 N·m), or you could damage the tensioner.
8. Place a second 3/8-inch (10-mm) diameter locking pin into the round hole on the idler arm of the rear tensioner. See Fig. 4 . Be careful to leave the end of the pin protruding enough to ease its removal. Both belt tensioners are now locked in the released (pre-tensioned) position. Remove the wrench from the square hole.
9. Remove the drive belts.
10. Install the new drive belts, making sure they are correctly installed on all the pulleys.
11. Using the 1/2-inch breaker bar or socket wrench, rotate the idler arm on the rear (smooth pulley) tensioner downward (counterclockwise), until you can remove the locking pin. Smoothly release the idler arm all the way up, being careful not to jerk it.
12. In the same manner as the previous step, remove the locking pin from the front belt tensioner.
13. Do a final check to make sure both drive belts are configured correctly, and correctly installed on all the pulleys.
14. Close the hood.
15. Connect the batteries.
16. Remove the chocks.